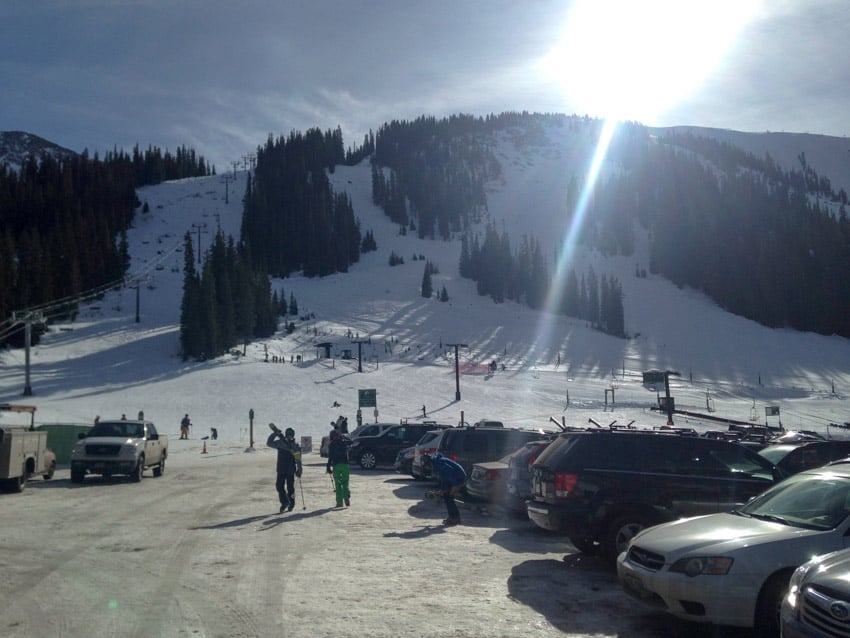
Who doesn’t love escaping the usual routine for an awesome skiing or snowboarding adventure? Breath in the fresh, cool mountain air. Carve down the slopes, hearing the crunch of the snow under your edges. Grab a nice drink and head for the hot tub to relax afterward.
But there’s one thing that can quickly ruin a ski trip. Not having the right gear. Or forgetting something.
That’s where this ski trip packing list comes in. Keep this handy while you’re packing and make sure you bring all that you need on your next big ski adventure. We’ve also made sure to throw in a bit of advice to keep your ski trip fun and hassle-free.

Ski Trip Packing List
You came here for the list and that’s what you’re getting first. Here’s your ski trip packing list:
SKI GEAR
• Skis/poles or snowboard
• Bindings
• Boots
• Bag for skis/snowboard/boots
• Ski jacket
• Ski pants
• Helmet
• Goggles
• Gloves
• Scarf or neck warmer
• Water bladder
CLOTHES
• Warm ski socks
• Base layer (top and bottom)
• Insulating layer top
• Insulating layer bottom
• Belt
• Winter hat or earmuffs
• Shirts
• Jeans
• Underwear
• Regular socks
• Swimsuit
• Light jacket
ACCESSORIES
• Sunglasses
• Chargers
• Toothbrush
• Toothpaste
• Soap
• Shampoo/Conditioner
• Hair product and comb
• Razor
• Feminine hygiene products
Check Before You Go
Now that you have the list, you can gather all of your clothes and gear and start packing. Do this early so that if you need to take care of anything or purchase new gear, you’ll have the time. Being forced to buy gear at the ski resort will almost always cost you more money and leave you with fewer options than if you were to shop beforehand.
As you pack your gear, inspect your skis and the equipment carefully. A full tune – including edge tuning, p-tex repairs, and a fresh coat of wax – should be done at least once a year for most skiers and more often for people that charge hard. If you’re spending big money on a ski trip, don’t fret over the cost of a good tune-up. You can always get a DIY ski tuning package to save money in the long run, but the professionals can likely do a better job.
Bindings should also be carefully inspected. Are any of the straps or pieces showing signs of failure? Are the bindings adjusted properly to fit the boots? Finding problems with your gear before you hit the slopes will not only save you a headache, it can also avoid dangerous equipment failures. Not fun having a binding break when you need it most.
If it’s been a while since you’ve used your outwear (jacket and pants), then you might want to try them on and see how their waterproofing is doing. If needed, you can treat older clothes with a fresh waterproofing treatment so that you’re in top shape to hit the slopes without breaking the bank and getting new gear.

How Many Layers Do You Need
This question depends on a lot of factors and the correct response to this question is “it depends.” How cold and windy will it be? How thick is your jacket? Do you typically feel cold? Is your base layer thick or thin?
Finding the right balance of layers is a challenge for even the most seasoned veterans of the slopes. Some days you’ll need a base layer, a sweater, a fleece, and a heavy jacket. Other days – like early or late season – you might be able to get away with a very light jacket and no base layer.
While you obviously don’t want to be too cold, you also don’t want to be too hot. If you start sweating while skiing, your clothes can get wet, and then they start to lose their insulation ability (especially if natural down).

Most people use a 3 or 4 layer system for skiing:
1. Base layer for top and pants that are made from synthetic, breathable material – this keeps a warm layer of air close to your body. Merino wool is a great material to look for in base layers.
2. Insulated middle layer. Might just be a thick flannel shirt (Paul Bunyan style) or it could be a thicker fleece, even a sweater.
3. And then it’s almost always topped off with proper ski jacket and snow pants.
Buy your base layer and jackets with your usual ski conditions in mind. Then adjust the middle layers according to the temperatures of the day. If you aren’t certain, you can always bring an extra middle layer with and store it in a locker if it’s too much. Quite often, people forgo insulation layers on the bottom half and just stick with the base layer and the outwear. But if your pants are thin, then maybe a pair of sweatpants or similar is needed.
Just remember: skiing and snowboarding require flexibility and you don’t want to be fighting your clothes. Wear layers that will move with you and won’t restrict your body.

How to Travel with Ski Gear
Regardless of how you’re traveling, you should always try to protect your gear. That’s where ski bags come in handy.
For car trips, usually the skis will need to go on top of the vehicle in the ski rack. If it’s an overnight trip, bring two bags in the car: one bag that is exclusively ski gear and another bag that has clothes and toiletries. This keeps everything organized and ready to go. No digging through your underwear to find a missing glove.
If you’re flying for your ski trip, you should take more precautions to protect your gear. Thankfully, a lot of airlines allow you to travel with ski or snowboard gear for the same price as any checked bag. Which is great. But you also need to make sure your gear is ready to handle the treatment of airline workers.
If you want the top-level protection for your gear, find a hard-sided ski bag. These are quite rare though. At a minimum, you want to get a bag that is protective and has wheels.
Most people use soft bags and understand that they’re going to get thrown around a bit. The trick is to keep the bag packed tight and use your clothes to protect your gear.

For skis, you can buy small straps which keep the skis close together. These are useful overall but great for flying with skis. Another trick is to use your thick clothing as packing insulation. Wrap your skis or snowboard with your thicker fabrics, especially around the edges. Just be careful so that you don’t cut up your expensive ski gear.
When you buy a ski bag, look for one that can handle your skis/board AND BOOTS. A lot of ski bags don’t have space for your boots, causing you to have a separate bag for boots. I probably don’t need to tell you how expensive it can be to fly with an extra bag.
Protect your goggles. Make sure to keep them in a case, and if you can, stuff them inside of one of your boots or in another area which is well protected. Goggles can be expensive and get ruined instantly by being mishandled.
If you have very expensive pieces of equipment, you should avoid putting that in checked bags and bring it carry-on. (This goes for any valuables whenever you are flying, honestly.)

A Swimsuit on Your Ski Trip Packing List?
If you’re wondering why there is a swimsuit on the list about ski trip packing list, then I have some news for you. Getting into a hot tub after a day of skiing is one of the best feelings in the world.
Many, many, many places to stay (hotels, condos, houses, everything) will have a hot tub. It’s just part of the mountain house needs. The restorative therapy of soaking in a hot tub after a long day of hard skiing is tremendous.
Don’t forget your suit!
How Important is a Water Bladder?
Quite often ski resorts are at very high altitudes. The air is thin, oxygen is low, and it can be extremely dry. If you don’t stay hydrated, a world of pain can come your way.
Your head starts to pound. You feel short of breath. And eventually, you can get nauseous and very ill. Your ski day ends early and you are on the couch recuperating. Not the ski trip that you planned on.
The best way to avoid altitude illness? Water.
And that’s why I recommend bringing a water bladder (Camel-Back type) along for the ride. It can be a bit dangerous to ski with a large water bottle since crashing on top of it can be painful. But with a bladder, you have constant access to the life-giving force you need without adding more risk. Just get one that won’t interfere with riding the ski lift.
If you prefer to stop often and just grab water while you’re inside, that will work too. Just don’t forget to drink up when you have the chance to.
Protect Your Eyes
Skiing and snowboarding come with many risks. Some risks are obvious – broken bones, knee injuries, and perhaps even frostbite.
But one overlooked risk is the blinding light on your eyes. Due to a combination of sunlight reflecting off of the snow and high-altitude conditions where the sunlight is a bit stronger, protecting your eyes needs to be high on your list of concerns.
For most people, this means using high-quality goggles ALL THE TIME when on the slopes. Why? Goggles provide full coverage against the elements. Sun, snow, and wind. They stay on when you’re ripping it up and it’s a no-fuss way to make sure your eyes are protected.

Sometimes people prefer sunglasses over goggles. Of course, sunglasses are better than nothing, but they’re a poor choice in snowy or windy conditions. And many people who prefer sunglasses have never used a high-quality set of goggles. There is a world of difference in a cheap $20 pair and one from the top manufacturers.
Make sure you do bring a pair of sunglasses no matter what – even if you don’t usually wear them while driving or just around town, the bright sun in most mountain areas will change your mind about that.
So do yourself a favor and get high-quality goggles to protect your vision while on your next ski trip.

Other Considerations for Your Ski Trip Packing List
Your eyes aren’t the only thing that needs protection for your ski trip. That’s where World Nomad Travel Insurance comes into play. It provides coverage for flight cancellations, lost luggage, and much more. It could save a lot of money when you’re looking at a very expensive ski trip with equipment you’ve invested in. Don’t leave home without it.
On the lighter side of things, you might be wondering how much of each clothing item to bring. Do you need three different sets of base layers if you are skiing for three days? Will my jacket be dry enough to use for a second day in a row? How many pairs of socks do you need?
The answers here also depend on your circumstances. But for the most part, people almost always use the same jacket/pants/base layers for multiple days. One good ski jacket and one pair of skiing pants should be sufficient for most ski trips.
Socks, however, are best to change daily. And if you have access to wash your base layer between uses, go for it. You should rarely, if ever, wash your jacket and pants. When you do so, make sure to use a detergent that is suitable for the waterproof material.
Jackets and pants can and do get wet after a big day on the slopes. That’s why it’s important to include a second jacket on your ski trip packing list. Once you’re done skiing, make sure to hang your ski jacket and pants somewhere it can dry fully before the next day. And use your other jacket and causal pants to go out on the town or do whatever it is you do after skiing.
Bring multiple pairs of socks, maybe throw in an extra base layer if you’re going on a trip longer than a weekend, and bring a secondary jacket you can use after the slopes while your main ski jacket is drying.

Ski Trip Packing List Summary
This ski trip packing list gives you all you need in one spot. Pack your gear early to see if you need to do any maintenance or get anything new. Review the weather forecast and plan your layering appropriately for it. If traveling by air, prepare your precious cargo for the long haul. And don’t forget your swimsuit!
Now that you have your ski trip packing list, make sure to read our latest post on winter gadgets, gear, and accessories! Multiple options for all of the essential winter gear (jackets, base layers, socks, gloves, hats, boots) plus some of the coolest new gadgets out for skiing. You won’t believe the ski technology that’s coming out.
What else do you bring skiing? I know everyone has their secret tips and must-haves for a day on the slopes. What are yours? Leave a comment below!
Like This Post? Pin It!